Zapier Integration: Setting Up Zapier With NachoNacho
The NachoNacho Integrations Powered by Zapier (“Zapier Integrations”) gives you immediate access to over 14 pre-made templates to work the way you want. However, you don’t need to stop there! NachoNacho can integrate with practically any app you’re using through Zapier, although it will require a bit of custom setup.
Estimated time to complete: 3-6 minutes.
Using NachoNacho’s Zapier Templates
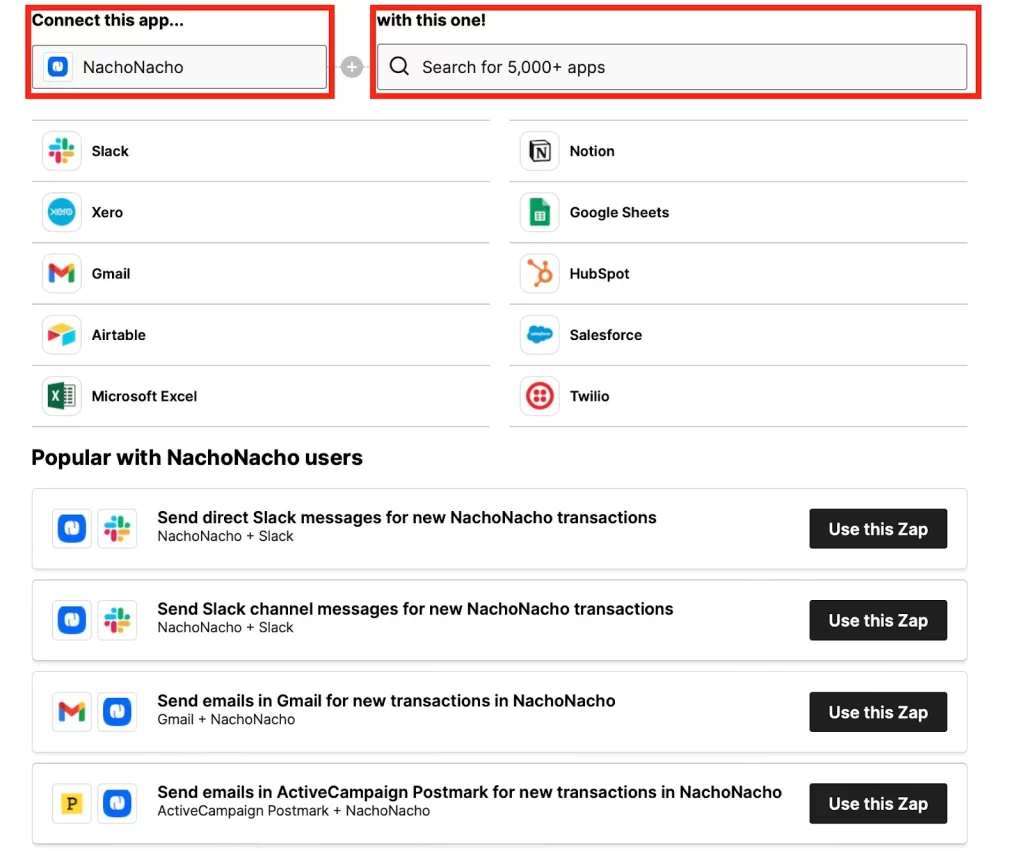
Step 1: Visit our Zapier integration page at NachoNacho.com
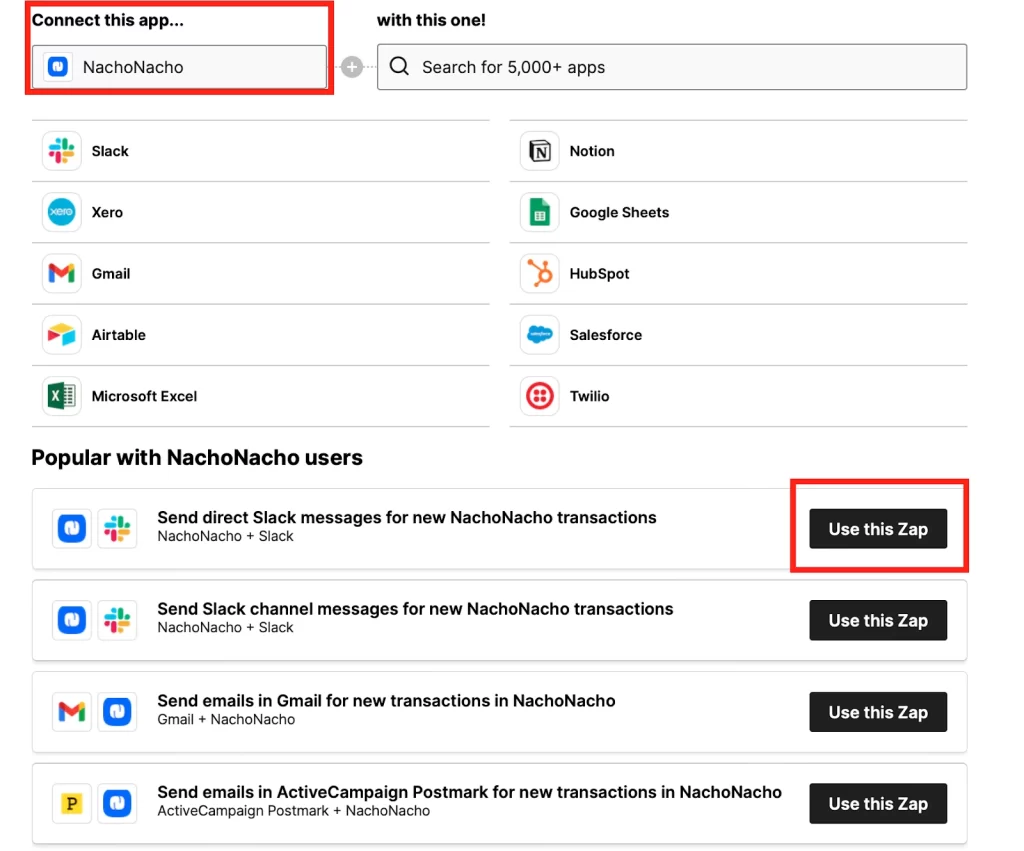
Step 2: Go to the “Popular with NachoNacho users” section for the pre-made templates and select the one that fits best with your needs. For instance, if you choose the first “Slack” integration, you’ll be able to receive notifications right into your team’s Slack when you have any subscription transactions on NachoNacho.
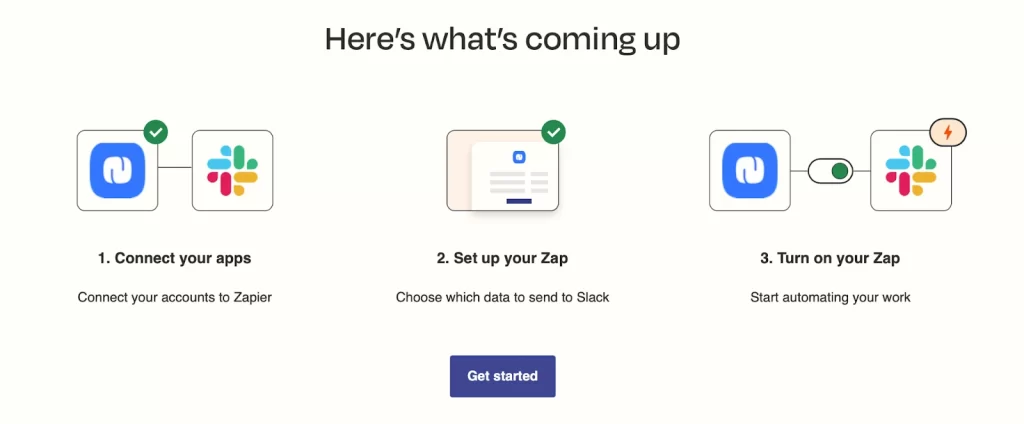
Step 3: If you haven’t yet, ensure you’re signed up for Zapier. If you’re already signed up, make sure you’re logged into your Zapier account. If you’re properly logged in, you should see the screen below. It’ll be slightly different for every different app, but the general premise is the same, you’ll need to connect your Slack and NachoNacho accounts to Zapier in this case. Then, you’ll choose the data you want to pass through, and finally, turn on your Zap to let NachoNacho work the way you do.
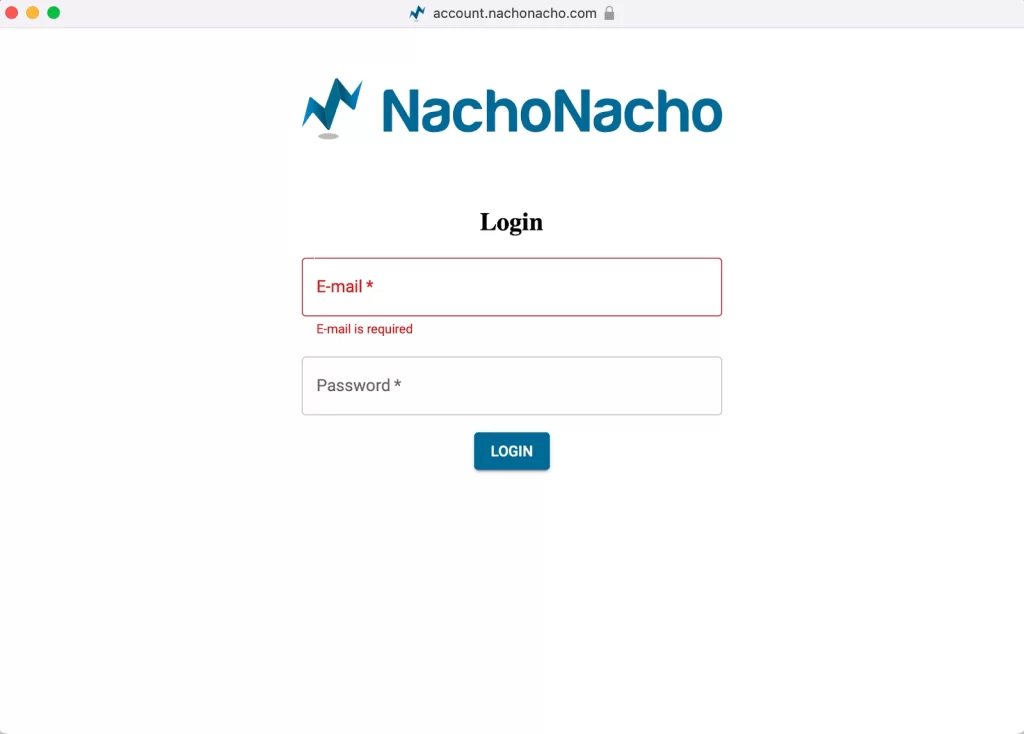
Step 4: Log in to your NachoNacho account. Zapier will ask you to connect to your NachoNacho account through a pop-up login page (make sure pop-ups are enabled).
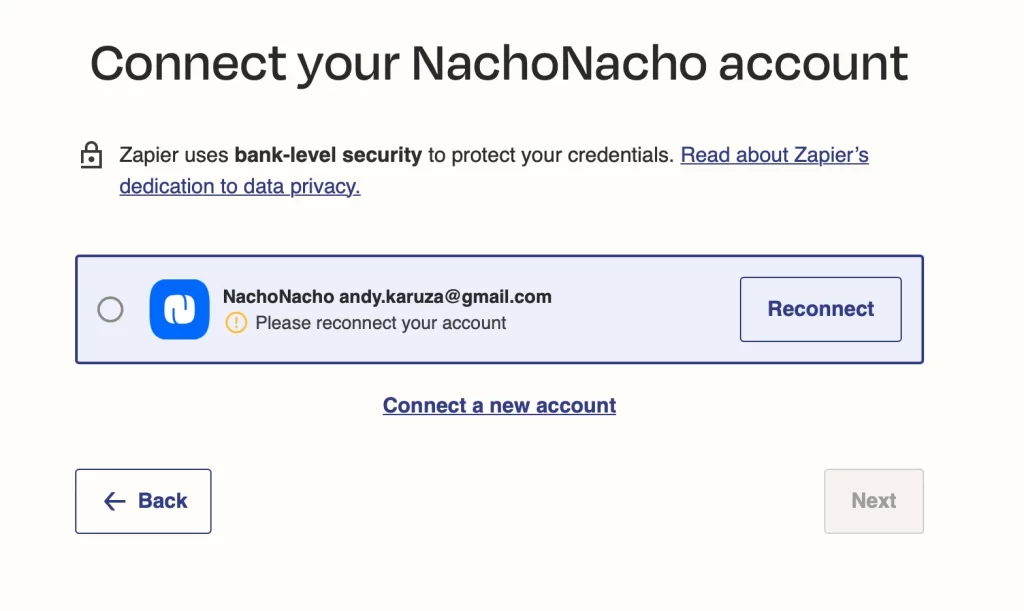
Hit the “Reconnect” button to pull up the login screen below.
Now you’re successfully logged in.
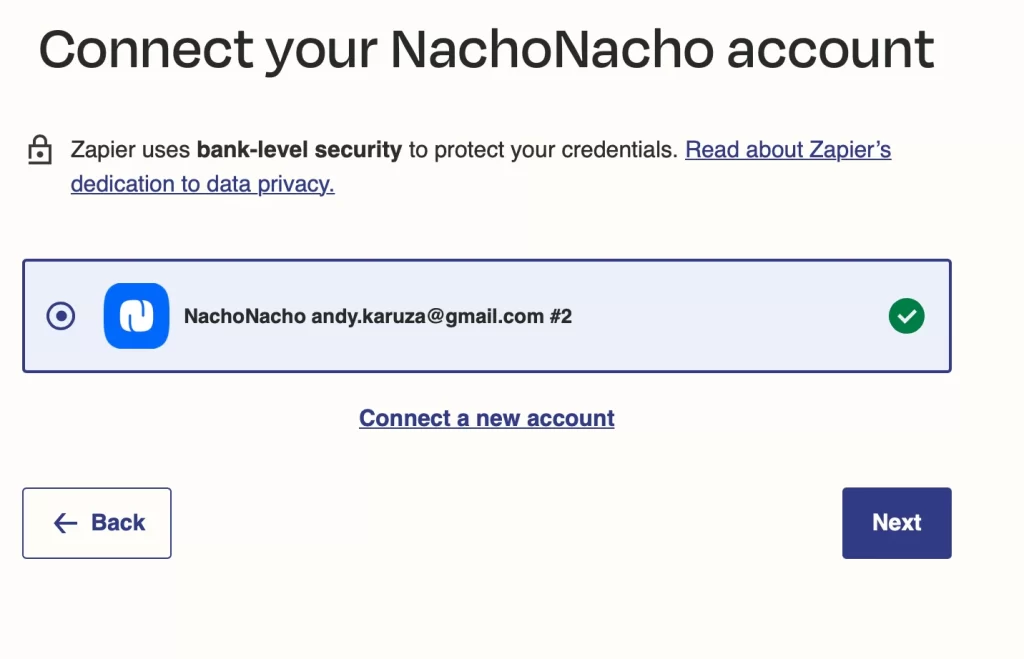
That’s it; now your NachoNacho account is connected! This is the first part of the three Zapier steps.
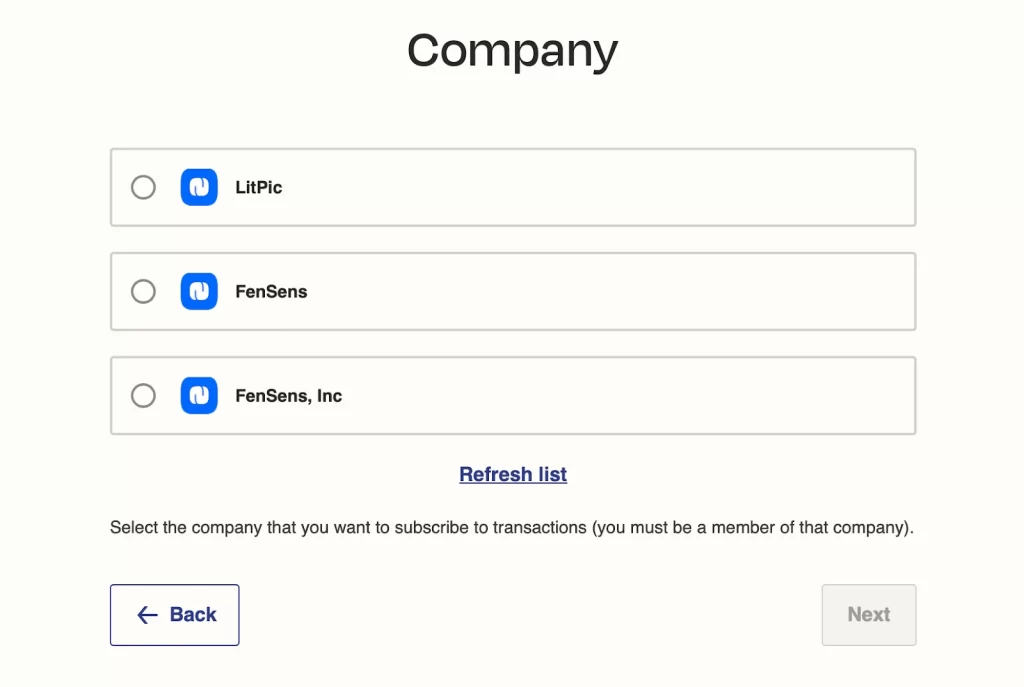
Step 5: Choose the NachoNacho company profile you want to pull data from. It will then be able to pull data from the company profile you chose.
Step 6: Connect Slack (or any other app you want to connect). The next step is to connect Slack. You’ll see a screen like the first one below. Click the “connect” button to connect your account. This experience will be similar for other apps too, Slack is just the example here.
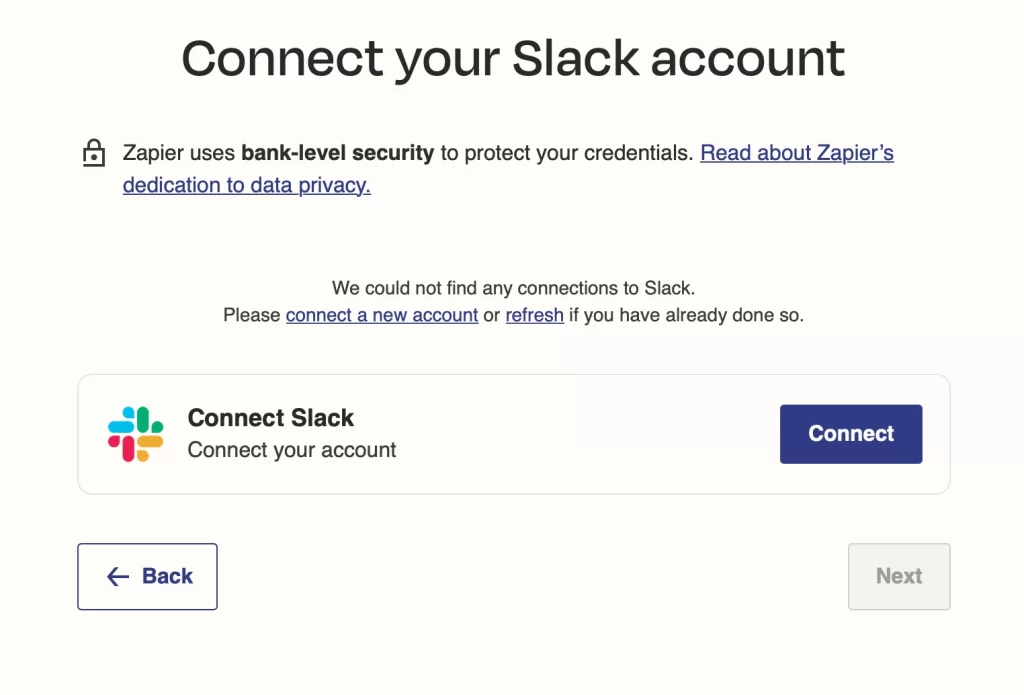
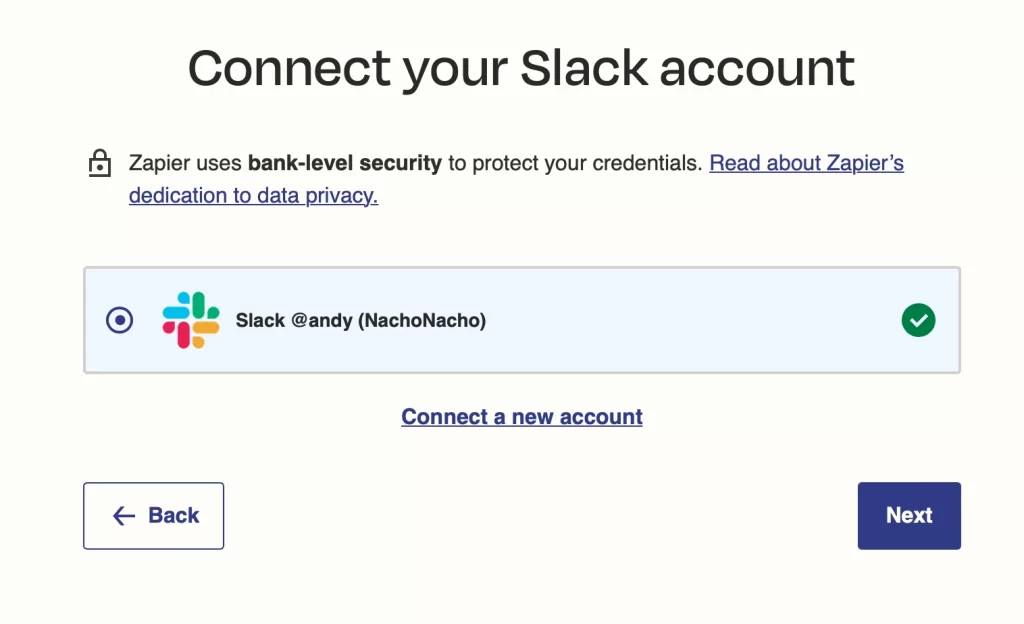
Step 7: Review and grant the necessary permissions asked for by Zapier. You should see the second screen with a green indicator if the app is successfully connected. Make sure you’re logged into Slack to avoid any connection issues.

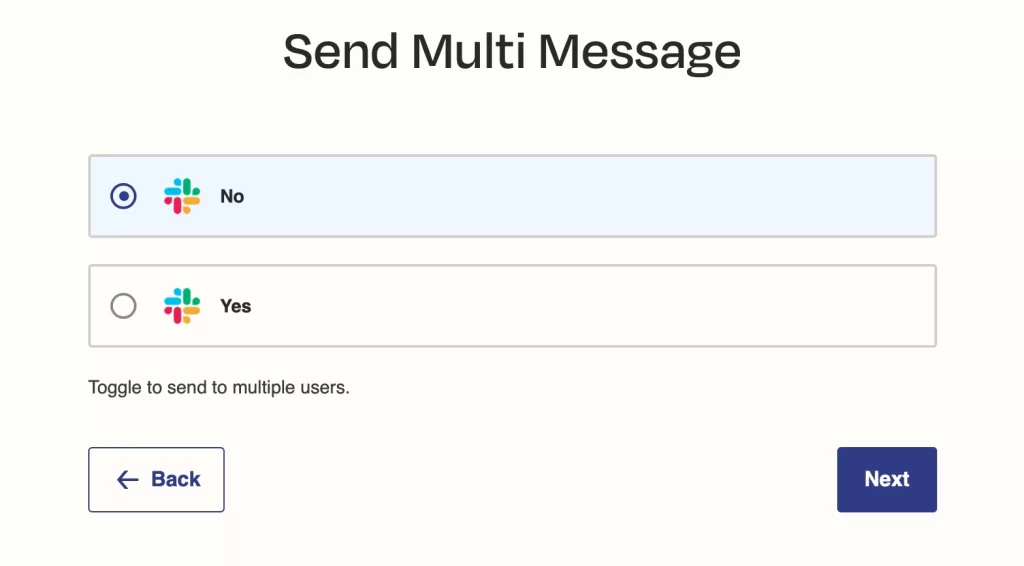
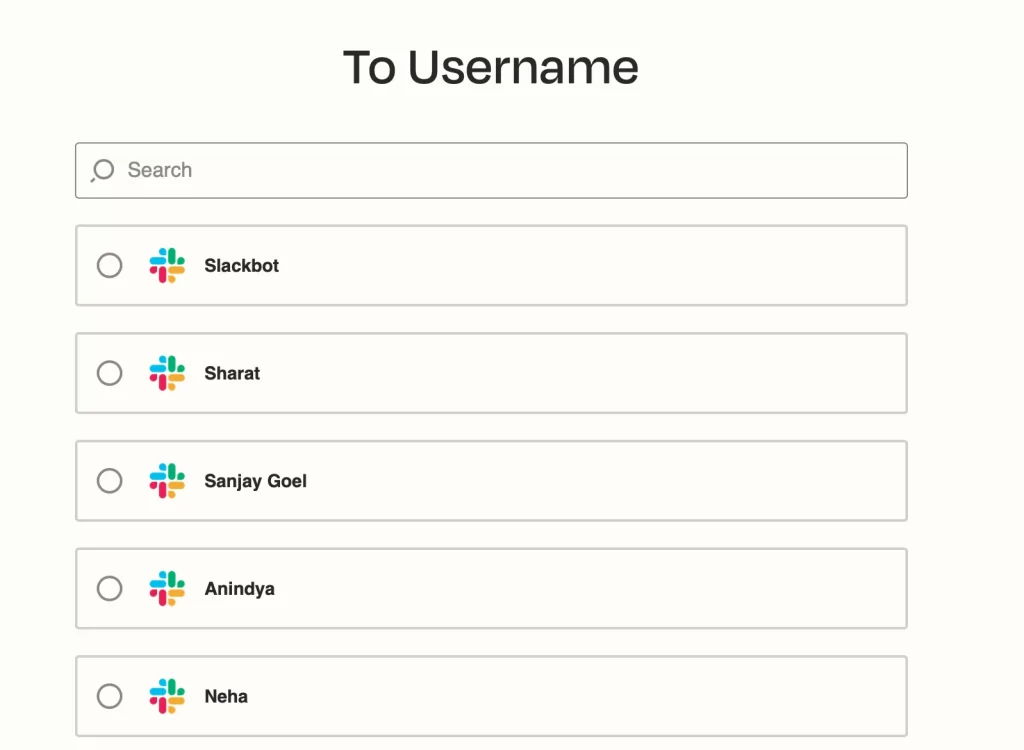
Step 8: Select your preferences for this app. Every Zap template will have different preferences that are pre-made, so make sure to customize them to your liking. For instance, in this toggle for Slack specifically, you can have a transaction notification message sent to either just one person (you) or multiple people within the company. In the Slack app example, you can select which specific user you want the notification sent to. In other apps, like Quickbooks, you can select the company account you want the transaction data sent to. Choose the preferences that work best for your needs.
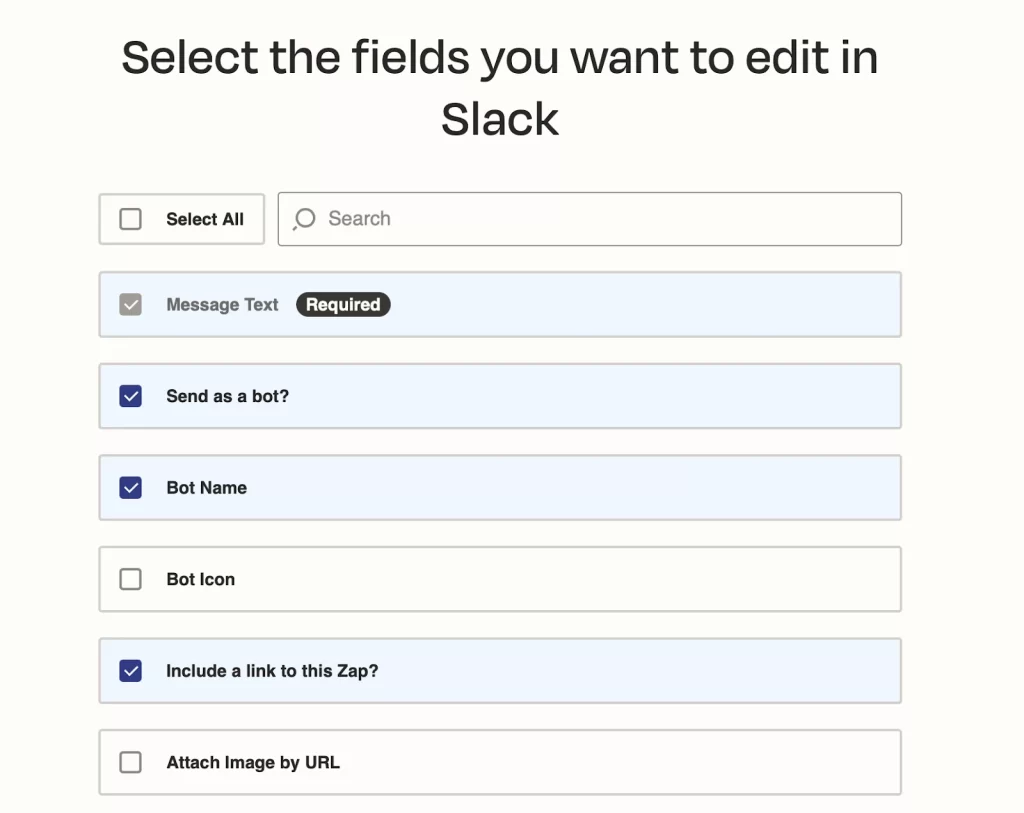
Step 9: All of our Zap Templates are set up with pre-configured settings that will work best for most users, but you can customize the settings as you wish. For instance, you can select “Attach an image URL” for the Slack app to receive an image of the transaction along with the notification. We highly suggest you keep the settings as they are. Click the “Next” button at the bottom to continue.
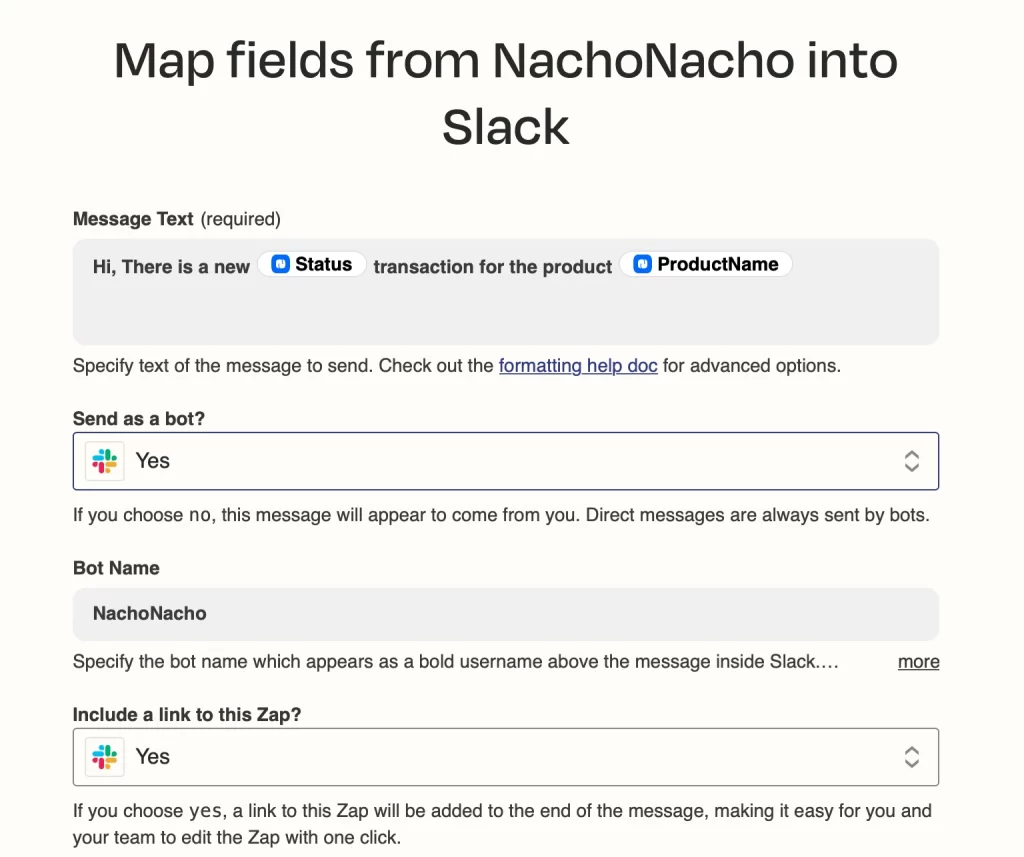
Step 10: On the next screen, you can map fields from NachoNacho into your app. These are already pre-configured, so you won’t need to adjust them, but you can if you wish. Read the instructions below each section carefully to understand what you’ll be configuring.
Step 11: On the next screen, you will test out your Zap. In the case of Slack, you’ll send a test message to your Slack account as if it’s automatically sending you a notification about a transaction as intended. For other apps, like Quickbooks, you’ll test posting a transaction data entry into your accounting records. If everything looks good, click “Send Test” and a notification should appear at the top of the page notifying you if the test was sent successfully.
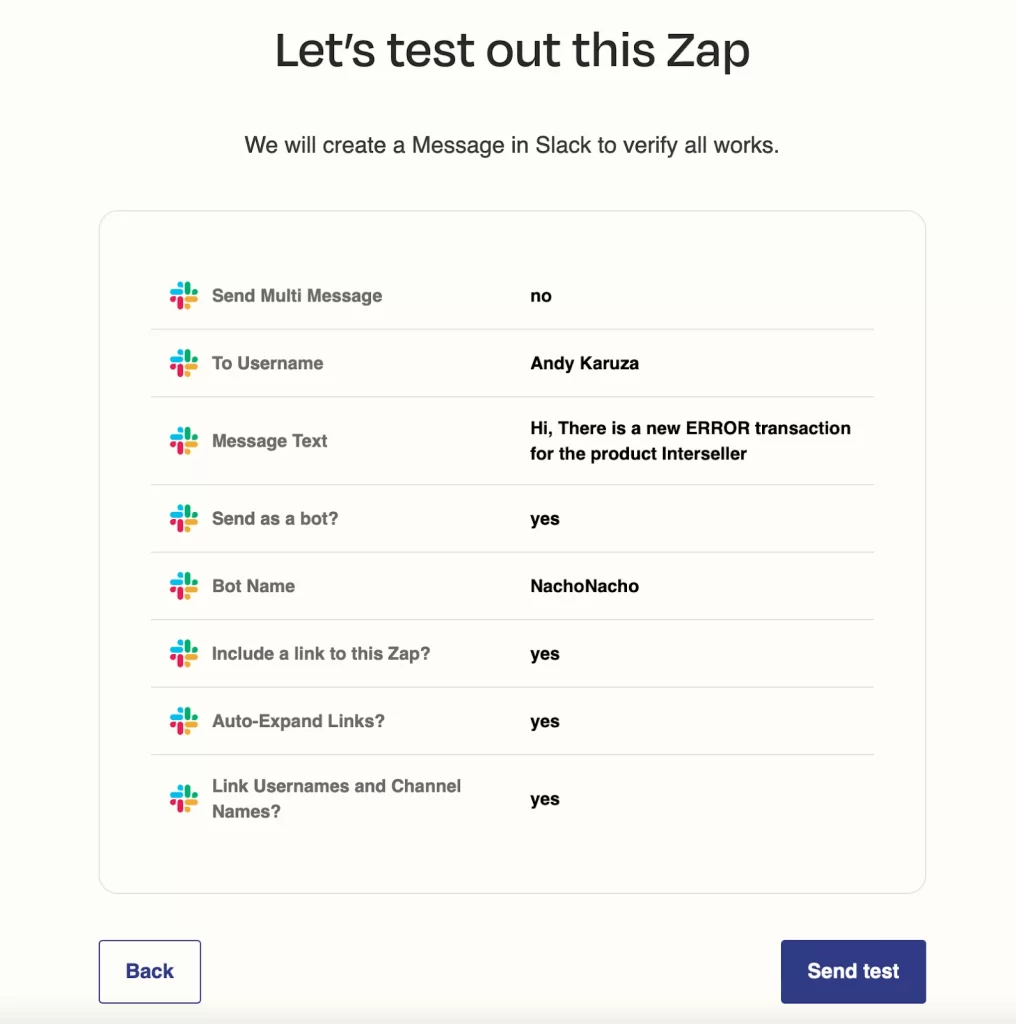
Step 12: You should now see the Slack message (in this case) in your Slack account according to your preferences. In the case of accounting software, you’ll see a test transaction line item in your books.

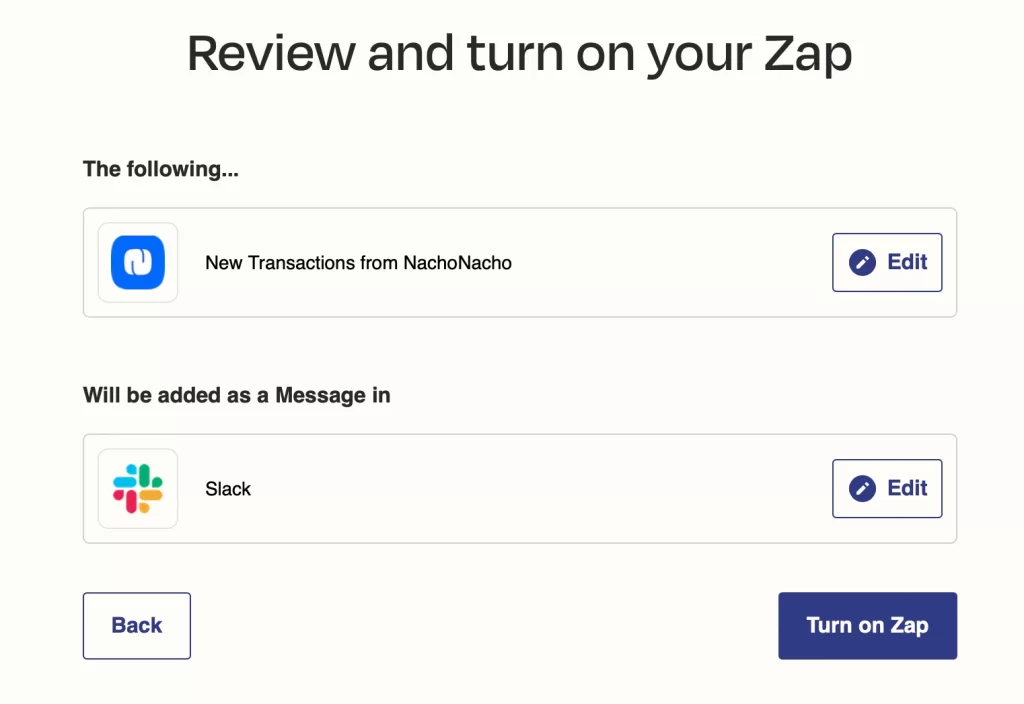
Step 13: You’re all done and ready to turn on your Zap! Click the “Turn on Zap” button to have your Zap start working automatically. Now, based on your preferences, you’ll get notifications right into Slack for any transaction.
You’re now ready to have NachoNacho work the way you do!
If you go to the Zapier Integration page on NachoNacho.com, you can also select from one of 5,000 other apps and customize them to your liking. Don’t see the accounting software you use in our suggested Zap template list? No problem! You can search (indicated in red below) for anyone of the 5,000 apps that Zapier supports and follow a similar pathway, as shown above, to connect your account and customize it to your liking.